
![]()
Among the giants of music streaming such as Pandora, is Spotify. Spotify is a music service which allows users to stream their favorite music and create playlists with them. As some students may have noticed, Spotify is not found when searching for it on the Ubuntu Software Center. For this reason, we have to manually add the source from which Spotify will download it. So let’s get started:
1. Connect to your home or another wireless network; the student network will not allow the repository we need to use in order for Spotify to be downloaded and accessed.
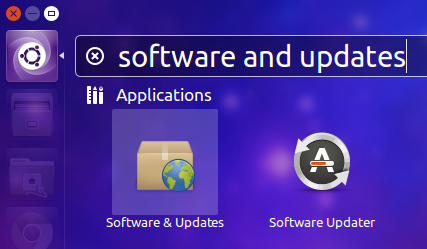
2. Open up the “Software & Updates” application from your launcher search menu. This can be achieved by clicking on the Dash launcher icon at the top of your dock and searching for “software”.
3. Click on the “Other Software” tab on the top of the “Software & Updates” window.
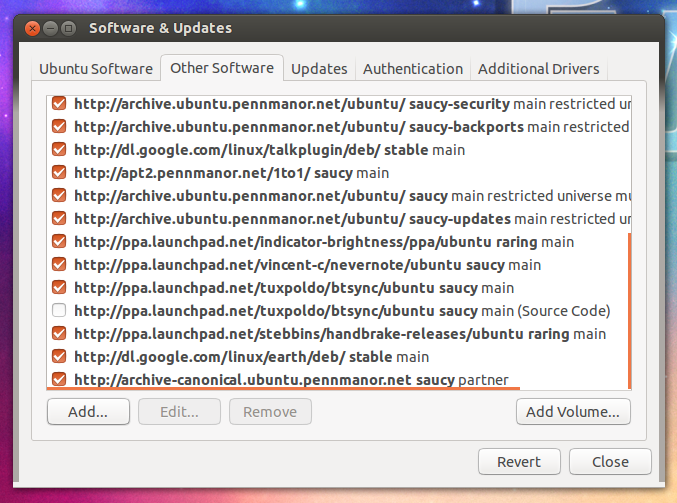
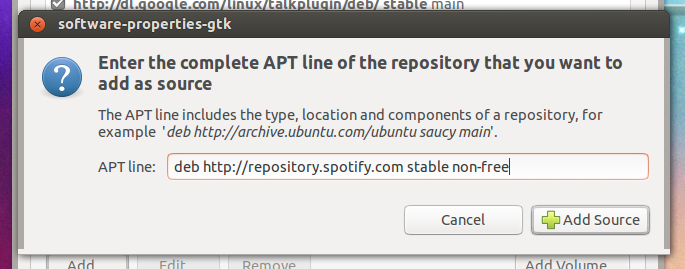
4. Click the “Add…” button in the bottom left corner of this window and paste the following line into the text box that will appear (without quotes):
“deb http://repository.spotify.com stable non-free”. Click the “Add source” button and then if prompted to enter your password, please do so.
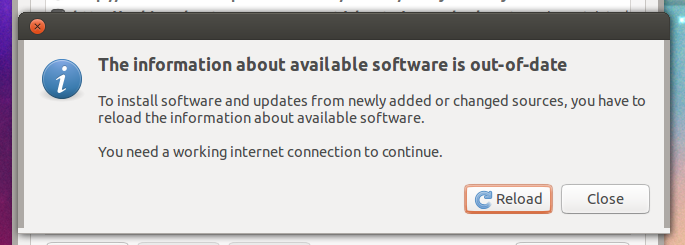
5. Click the “Close” button on the “Software & Updates” window. A dialog window should prompt you that “The information about available software is out-of-date.” Click the “Reload” button and let the computer refresh the software sources list.
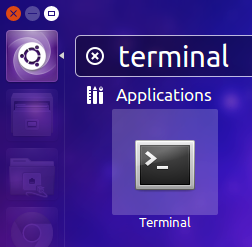
6. Click on the Dash launcher icon once again, and search for “Terminal”, and click on it’s icon.
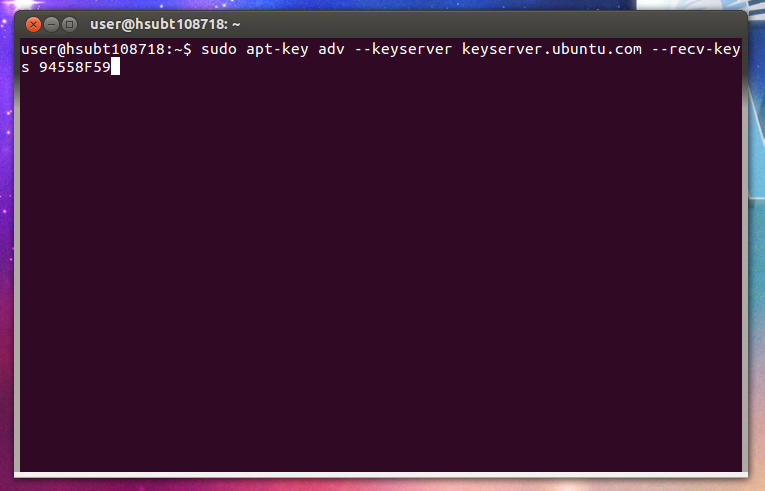
7. After Terminal opens, paste (Shift + Ins) the following into the prompt (without quotes) and hit the Enter key:
“sudo apt-key adv ‐‐keyserver keyserver.ubuntu.com ‐‐recv-keys 94558F59”. If asked for a password, enter the password that you use to login to your 1:1 laptop.
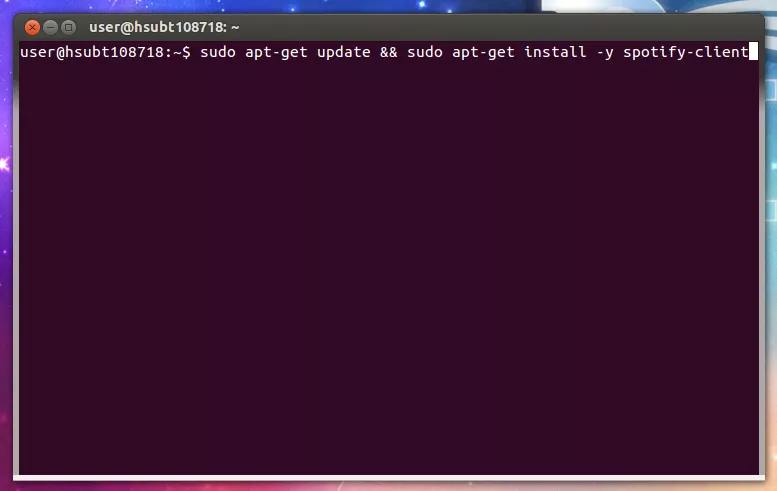
8. After the last command has finished, paste the next line into the prompt (without quotes) and press the Enter key:
“sudo apt-get update && sudo apt-get install -y spotify-client”.
9. After Spotify has been downloaded and installed, type “exit” into the Terminal prompt.
If all of the steps were completed successfully, you should now be able to find and launch Spotify from the Dash launcher. If your Spotify account was created through Facebook, you will need to log in using the email address attached to your Facebook account. Clicking “Log in Using Facebook” will not work. If you have any issues or questions regarding installing Spotify, please consult a student tech specialist or create a support ticket on the 1:1 support site.