
Originally written by Courtney Huyser. Rewritten by Abbi McHenry…
MuseScore is a program that comes pre-installed on your laptop that allows you to compose your own songs. MuseScore imitates more professional programs like Finale and the DJDJ Mixing App, but unlike these applications, it is free and is offered on Linux, Mac, and Windows. If you want to look into arranging your own basic composition, then MuseScore would be a great option for you to look into!
![]()
MuseScore is available for anyone to play around with since it is free on your student laptops. MuseScore allows you to pick from a range of instruments and allows you to arrange a director’s copy of your song. Many people use MuseScore to create basic piano compositions, rewrite pop songs into band stand tunes and get an idea of what a piece of music sounds like.
 When opening MuseScore, it will give you a pre-made sample of what you can make with it. For example, when opening this certain session it gives a sample of a song called ‘Reunion’. MuseScore lets you listen to it and tinker around with the basics of the song. To the left of the screen, it gives you a list of objects/markings you can add to your song. Adding things like breaths and pauses and repeat signs will give your song a more in-depth and professional sound.
Getting Started!
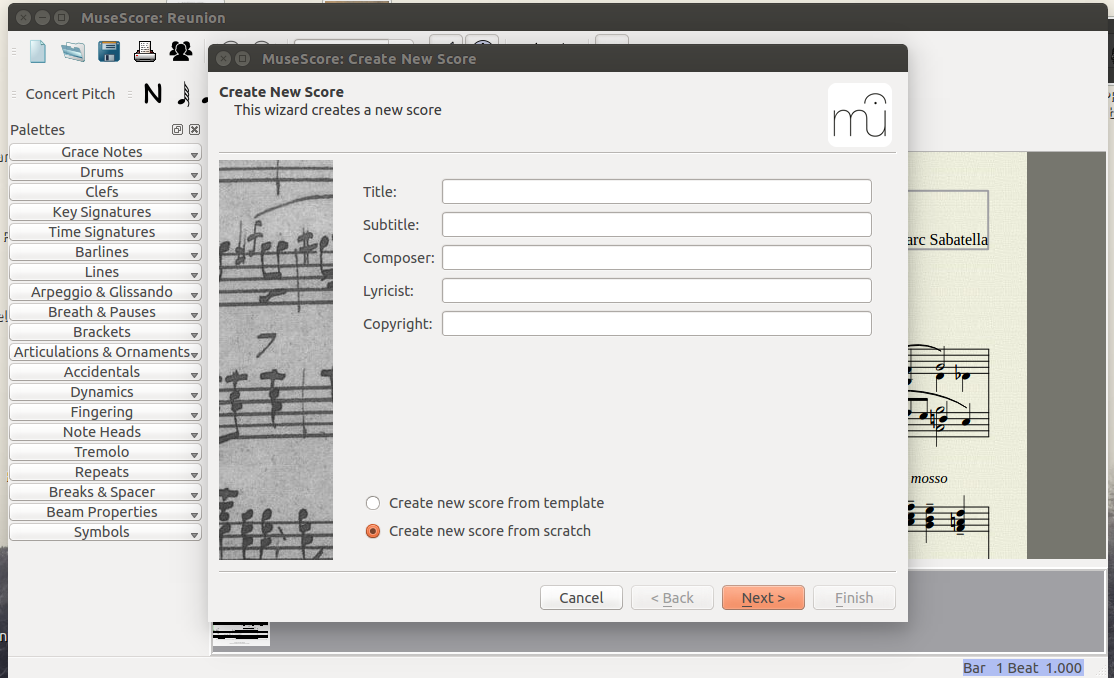 If you want to open a new project, go to (File>New). A new window will pop up and give you the option to choose a title, a subtitle, the name of the composer (you!) the lyricist (if there is one) and if it is copyrighted or not. You also have the option to create it from scratch or start with a pre-made template. When you are ready to start, press NEXT. For this example, we’ll call it “The Ballad of Room 200”. (Catchy, right?)
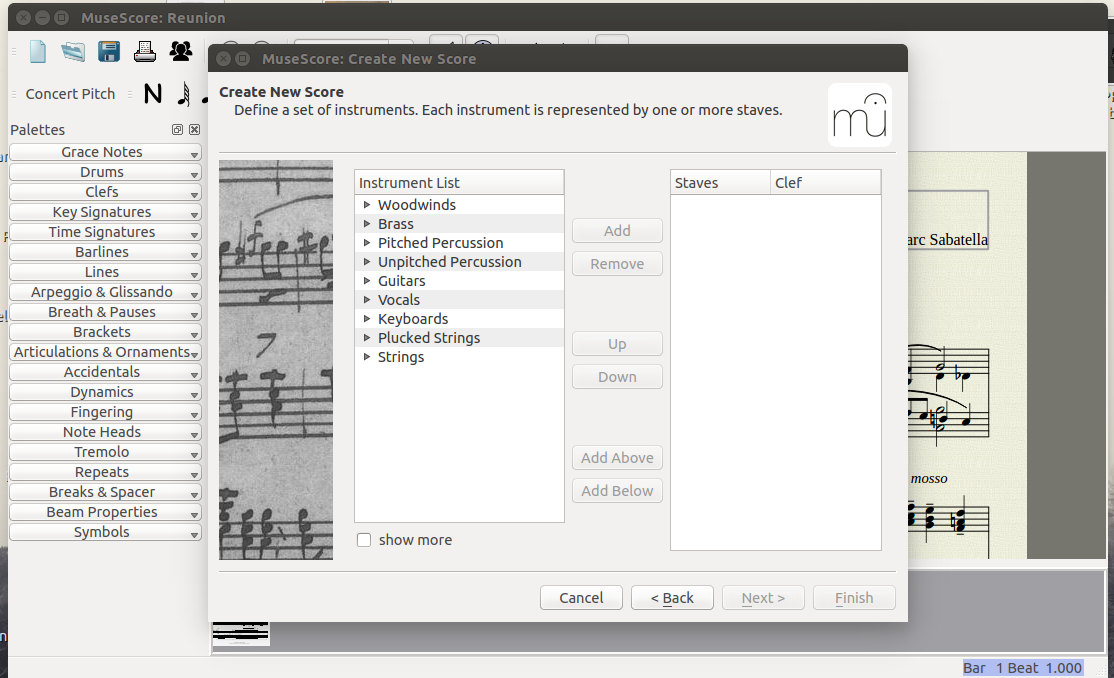 When you click the NEXT button, it will give you a list of different sub-sections of instruments. For example, woodwinds, brass, percussion and strings. When you click one of these subsections, you are given a list of instruments that fall into this sub-section. For example, in woodwinds, it would give you the option for flutes, piccolos, bassoons and clarinets (and more). To start an example, we’ll add a Flute, Alto Saxophone, Bb Trumpet and a Bb Tuba. When you’re done, click NEXT.
 Next, it will give you the option to choose your new key signature. This will allow you to have your default key unless you specify otherwise later in your piece. For our example, we’ll choose the key of Eb, which has three flats. (Bb, Ab, and Eb) When you’re done, click the NEXT button.
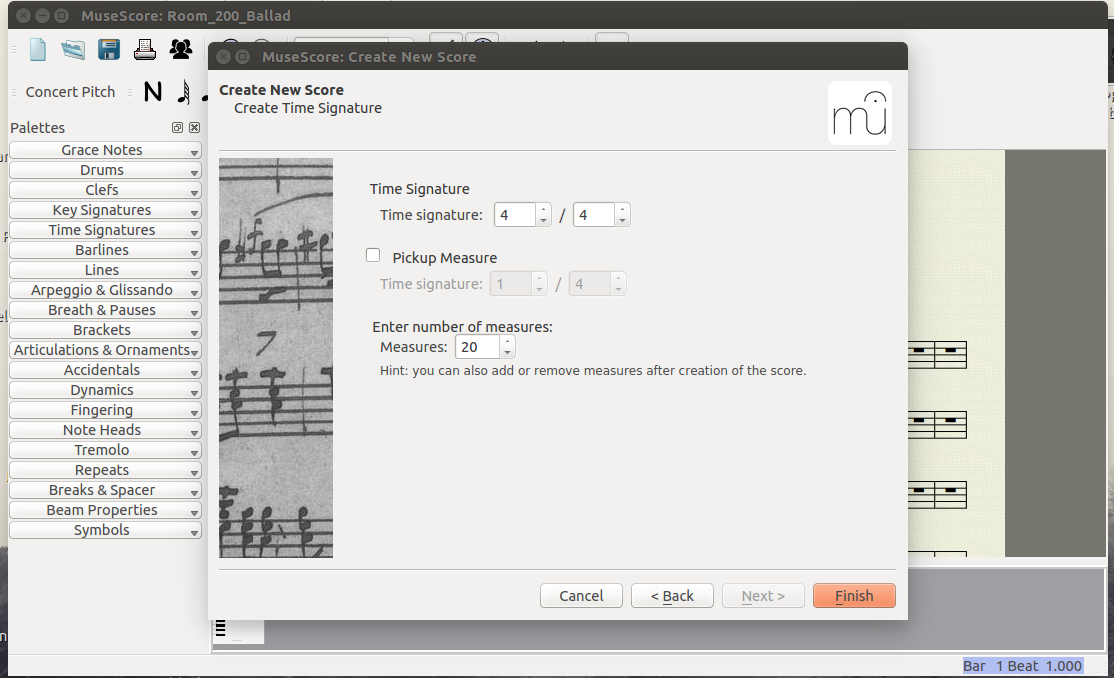 The next window will ask you to choose your time signature and the initial number of measures you want in your project. You can also add a pickup measure if you want, which allows for pick-up notes and beginning cues. We will start with a standard 4/4 measure (four beats per measure) and start with 20 measures. We will not start with a pick-up measure. When you’re done, click NEXT.
 The next window will take you to your final product, which should look something like the image above. To edit a new measure, click on the rest symbol (it should be highlighted blue) and click the “N” button in the top lefthand corner. This will allow you to add notes to your discretion.
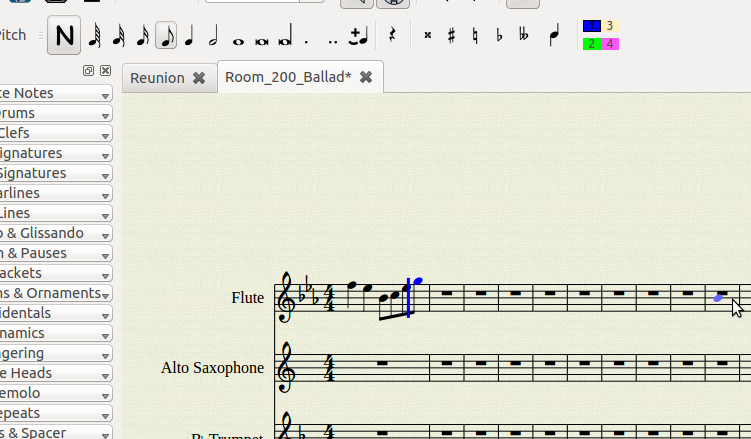 To add a new kind of note, simply click on the type of note you want (whole, half, quarter, eighth etc.) and add to your measure by clicking in the measure you want. In our example, we’ll add two quarter notes and four eighth notes onto the flute part. See how the pairs of eighth notes automatically connect? That is a feature that most similar free platforms do not come with. MuseScore automatically does this so as to make your final director’s copy look clean.
 Let’s say after a while, you want to listen to how your piece sounds. In order to do this, you go to the top hand corner to the list of play buttons at the top. Click the back button (it takes you to the beginning of your song) and then click your play button. This will play through your song while showing you where the player is in the music.
There are much, much more options and tricks to MuseScore since it is a very in-depth and complicated program. The above step-by-step list is to help get the ball rolling. If you wish to know more information about this very helpful program, click here for more information.
And there you have it! The basics of the program that will help you tap into the musical genius inside of you! Maybe someday, the Ballad of Room 200 will make it to the top 40…